Introduction
Rigging is the process of aligning a skeleton structure into a 3D model and assigning the suitable skinning weights for each vertex. It is a time consuming process even by an experienced animator. Although sometimes it is possible to obtain a rigged model to use in SmartBody, most of the time only 3D models could be obtained either from the web or via 3D scans. Therefore SmartBody provides an experimental auto-rigging functionality into SBGUI tool. The user can input a human-like 3D model and have it immediately animated in SmartBody environment. To achieve auto-rigging, SmartBody integrates Pinocchio ( http://www.mit.edu/~ibaran/autorig/pinocchio.html ) as part of SBGUI tool.
How to Use
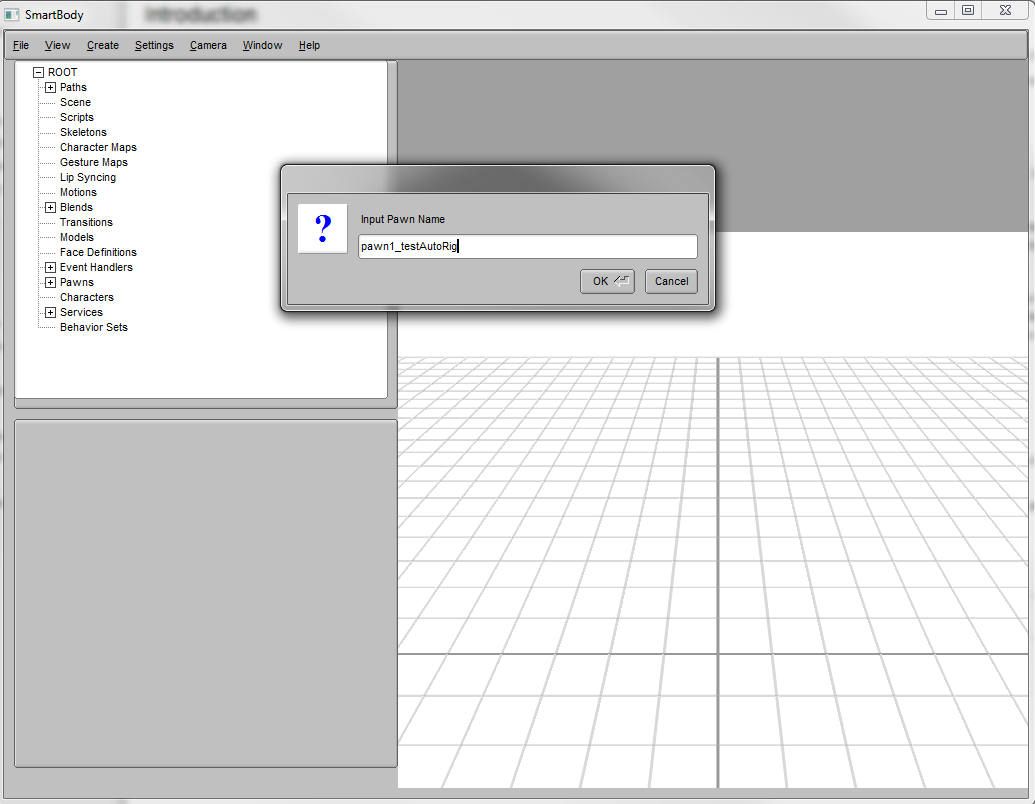
First, we need to create a pawn with 3D mesh in the scene. Select Create->Pawn in the SBGUI menu to create an empty pawn. Then in Resource Panel, select the newly created pawn and set its attribute "mesh" to the correct mesh asset in the system.
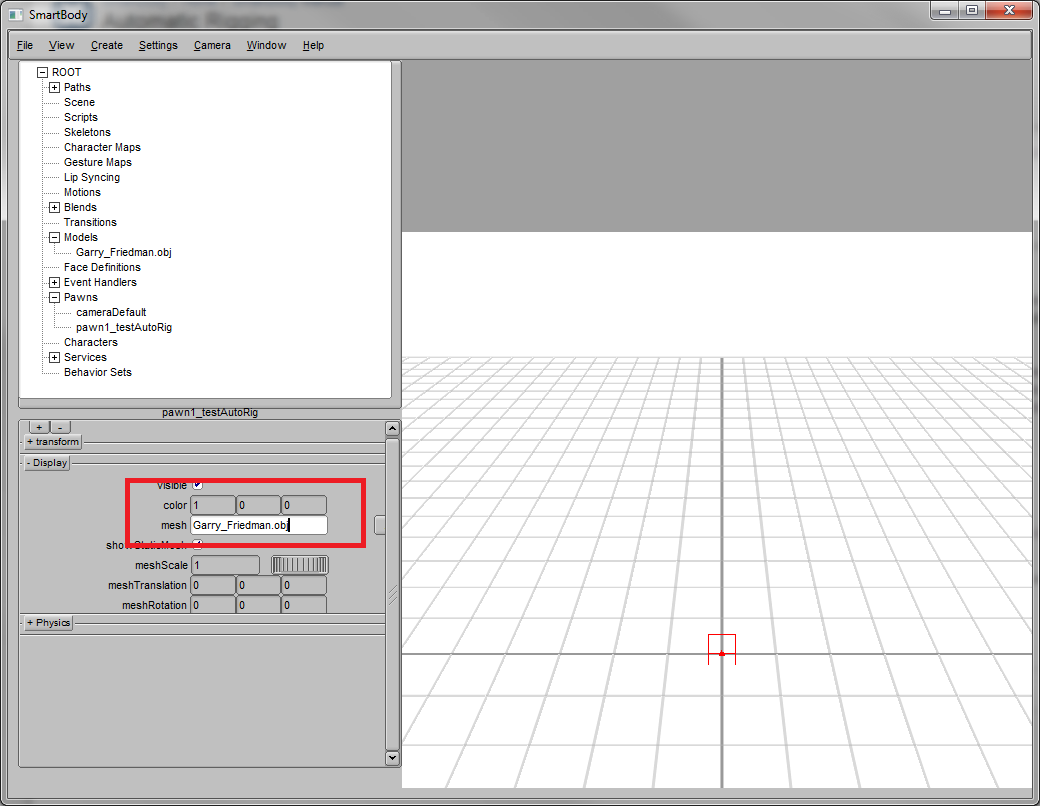
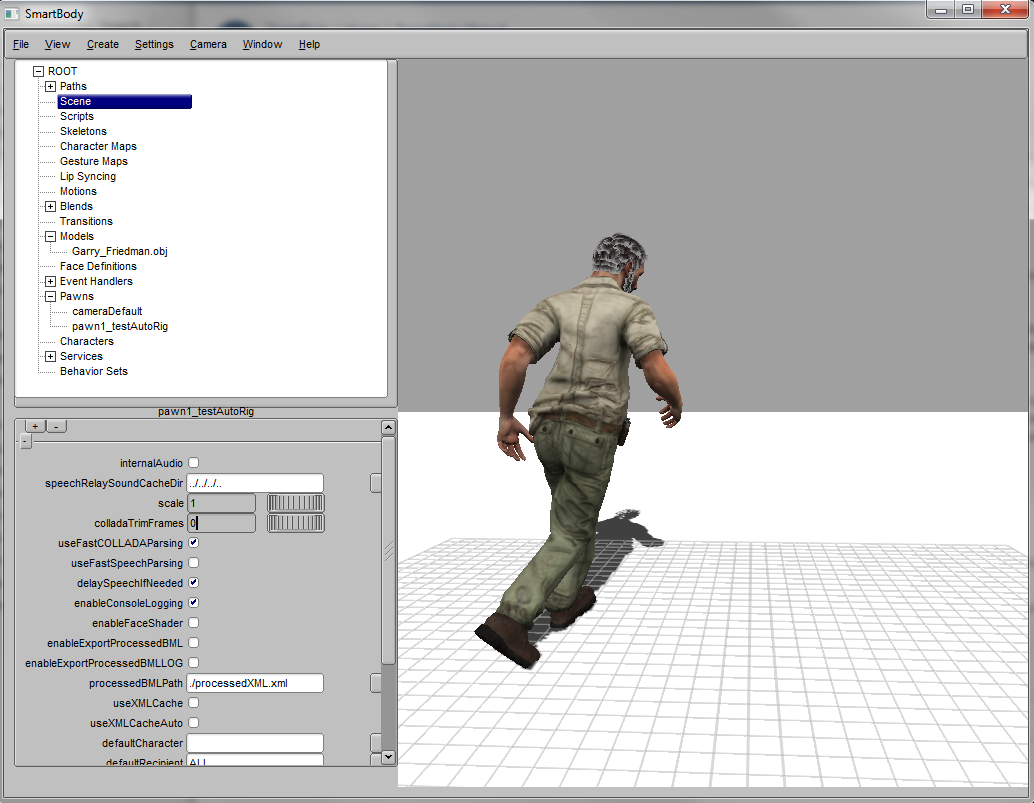
The model then will be shown on the screen. However, since this is only a static mesh without any skeleton or skinning weight information, we need to apply auto-rigging process to synthesize its skeleton and skin bindings.

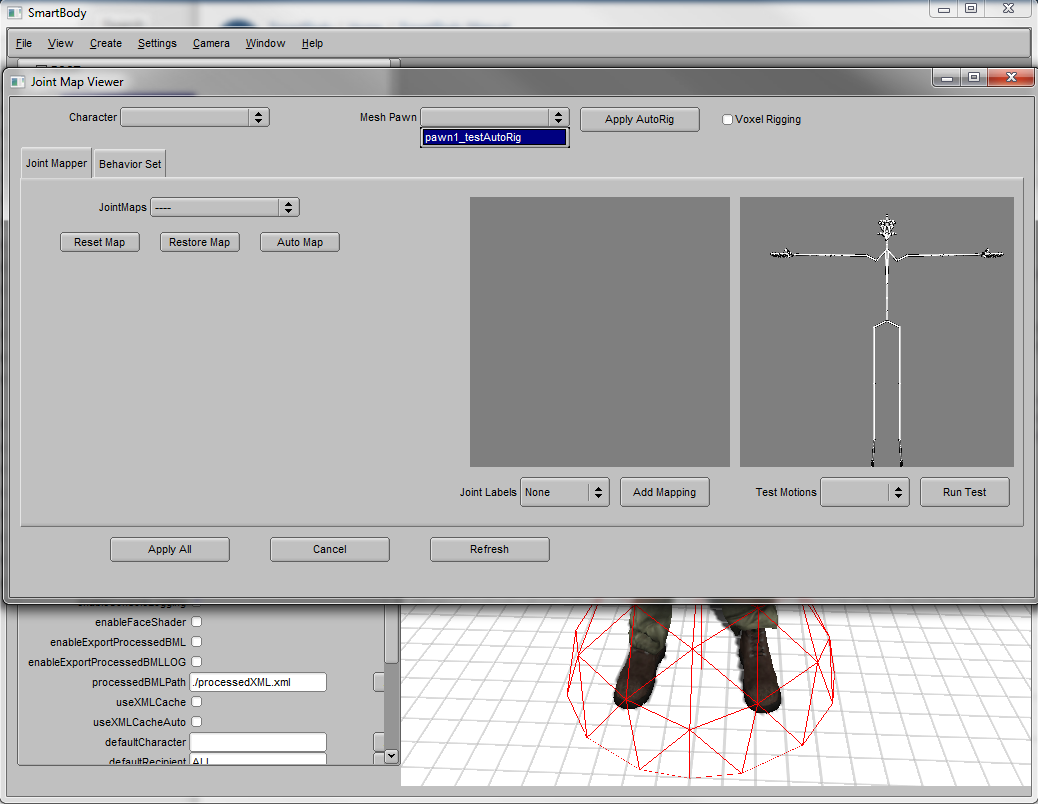
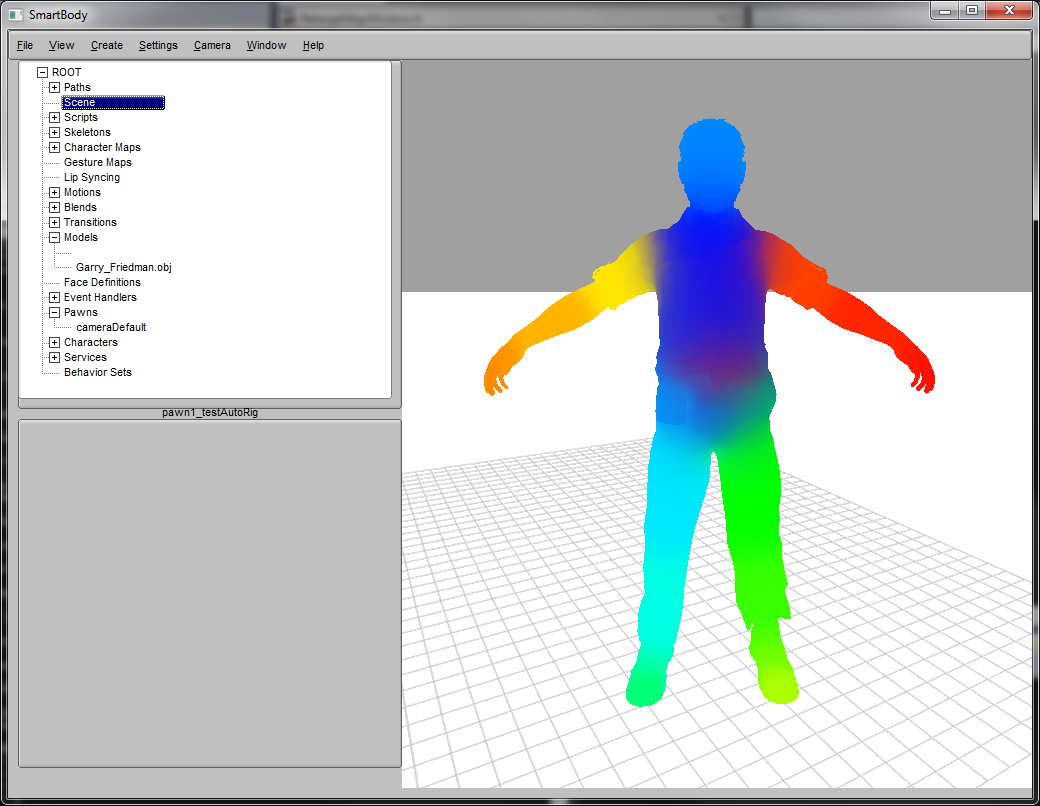
To achieve this, we can open the Retarget Viewer in Window->Retarget Viewer. It will shows a list of pawns on the upper-right. Select the desired pawn and choose AutoRigging to start the rigging process. The auto-rigging process may take about 10~30 seconds to complete. Once it is done, a new character will be created with newly synthesized skeleton in the viewer. The new character's skin weight can also be visualized by selecting View->Character->Skin Weight.

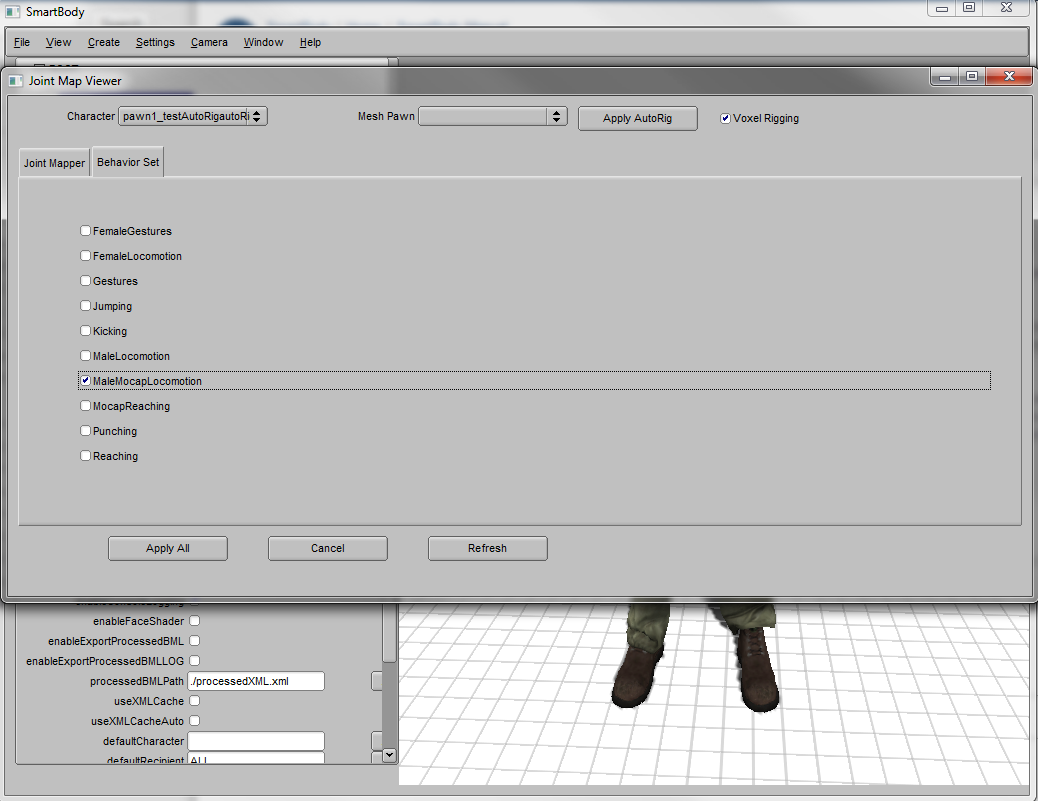
Once we produced the skinned mesh, The joint name mapping and the retarget process can then be applied on this character to produce an animated character.

Note : The original Pinocchio algorithm works only for water-tight and single component mesh. However, a lot of 3D models used in production may contain either holes or additional mesh components for hairs or props. Thus it is difficult to produce a model that can work out-of-box in Pinocchio. To alleviate this problem, SmartBody provides a voxel-rigging option to pre-process the input 3D model into voxel representation. The voxel model is used for auto-rigging in place of the original mesh to ensure a watertight and connected model is used in Pinocchio. The rigging results from Pinocchio are then mapped back to the origianl model to complete the auto-rigging. This option is more time consuming but can works for most production 3D models. Thus it is recommended when the original method fails. It can be enabled by selecting "VoxelRigging" checkbox.
Limitation
Although the auto-rigging can be applied on most 3D models, there are a few cases it may fail or produce undesired results. First, it only works for human-like models with limbs proportion similar to a human. Thus for characters with very short or long limbs, the method may produce a bad skeleton fitting.
Also, the method can not deal the hollow or empty space inside the model correct. For example, the robot model here has an arm formed by a few pipes and doesn't have a concrete arm shape. The method will have difficulty inferring the arm joints in this situations. This situation is rare but can happen in some mechanical or cartoon characters.
Rigging with Scripts
The autorigging capability can be used without a user interface by calling the Python commands to load the asset, associate the model with a pawn, then save out the rig to a .dae file. Here is an example:
from AutoRig import *
assetManager = scene.getAssetManager()
assetManager.loadAsset('e:/testExport/test.ply') # Here needs to change the input mesh file name
pawn = scene.createPawn("testAutoRig")
pawn.setStringAttribute("mesh", "test.ply")
pawn.setDoubleAttribute("rotY",-180.0)
pawn.setDoubleAttribute("rotZ", -90.0)
autoRigManager = SBAutoRigManager.getAutoRigManager()
autoRigManager.buildAutoRiggingFromPawnMesh('testAutoRig',0, 'testAutoRig.sk', 'testAutoRig.dae')
saveDeformableMesh('testAutoRig.dae', 'testAutoRig.sk', "e:/testExport/")