Blend Editor Overview

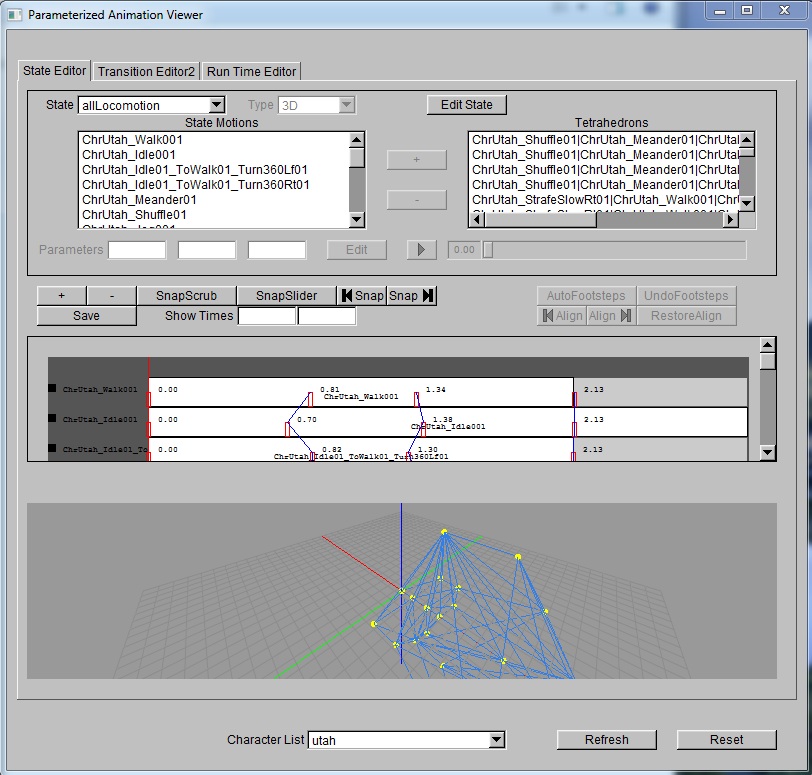
Under SmartBody viewer, go to window, select Parameterized Animation Viewer, you will see above window. There are three tab groups, blend editor, transition editor, run time editor. By default, run time editor is selected. Click blend editor, we will start here.
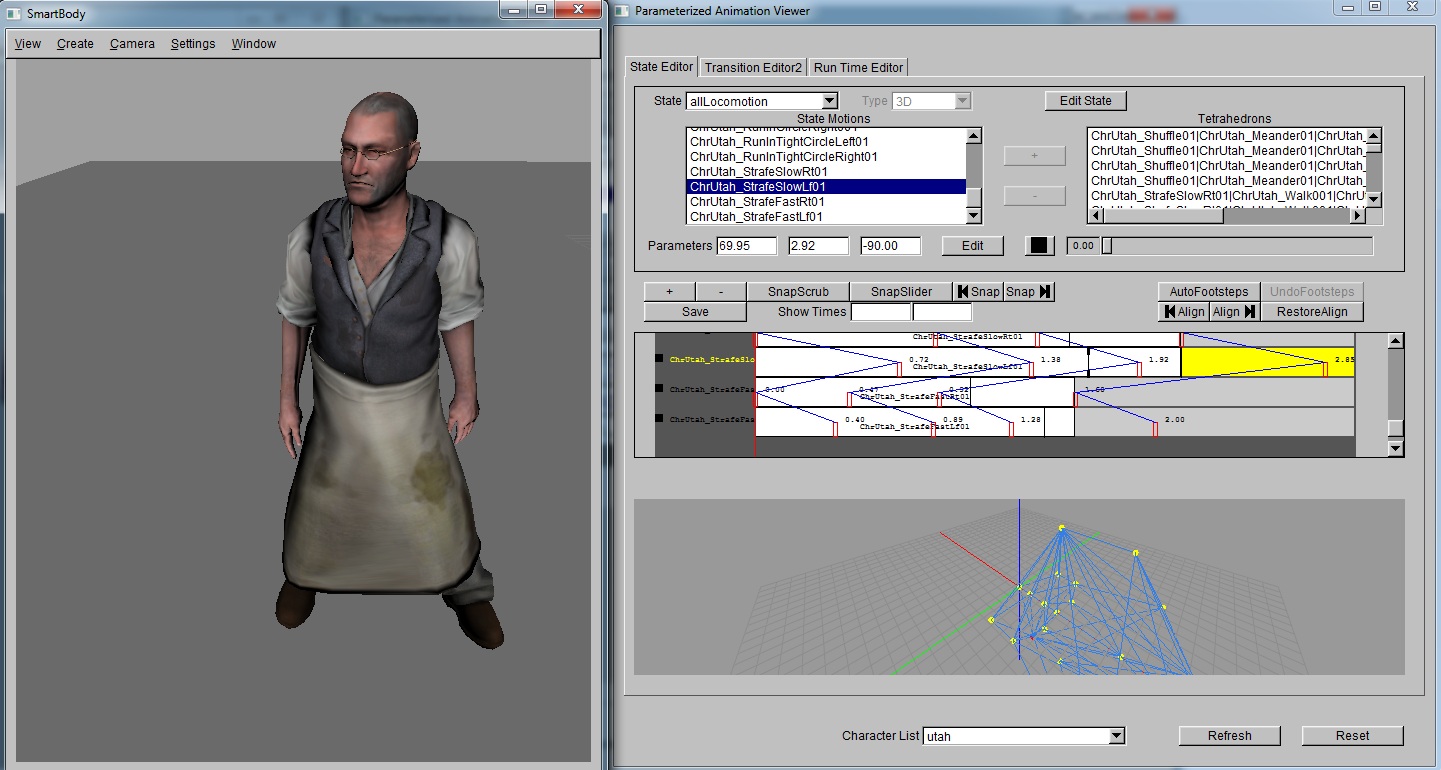
The Blend Editor contains three sections.
First section, general state management.
- State List: list of all the current available states. By default, the value is set to empty. Empty state will switch the button right to state list to "Create Blend", other valid state will switch the button to "Edit Blend".
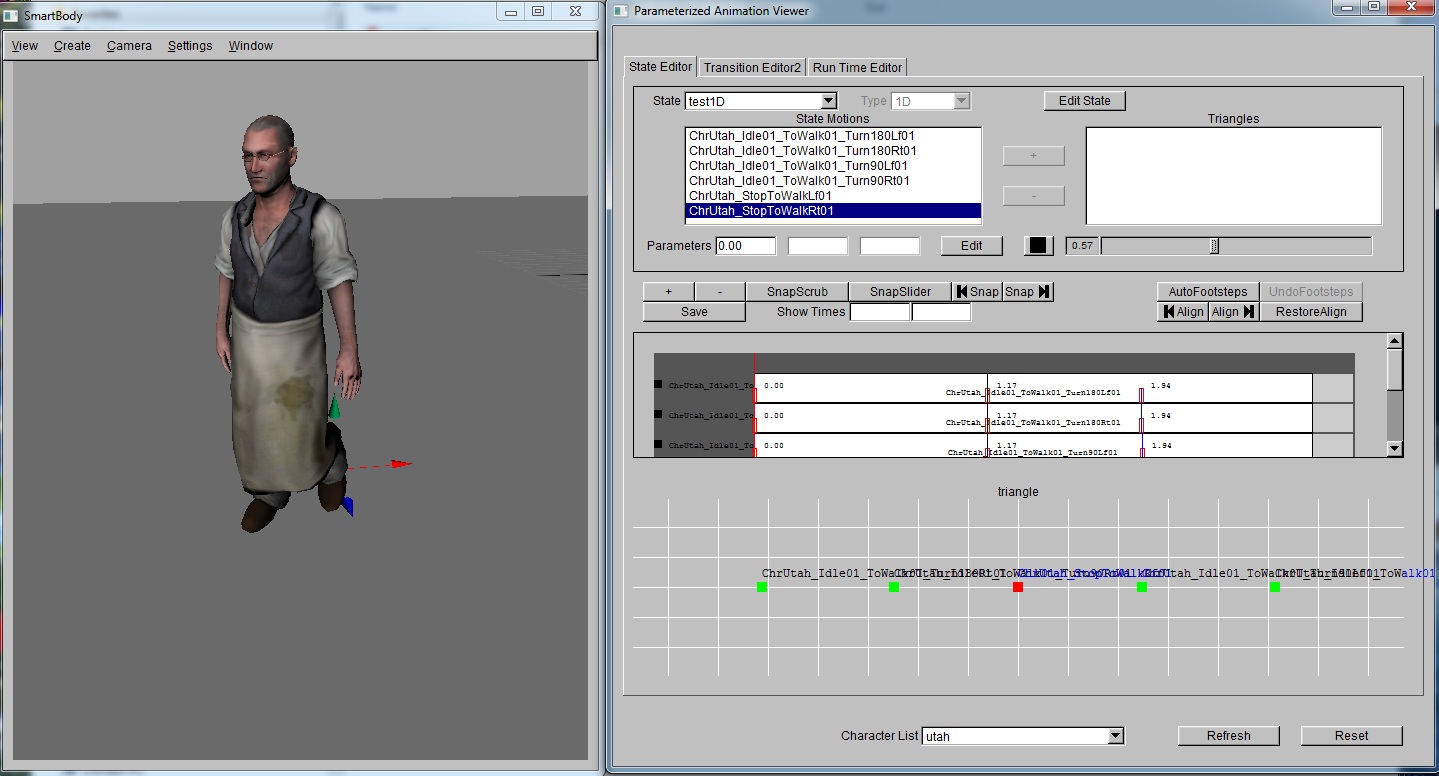
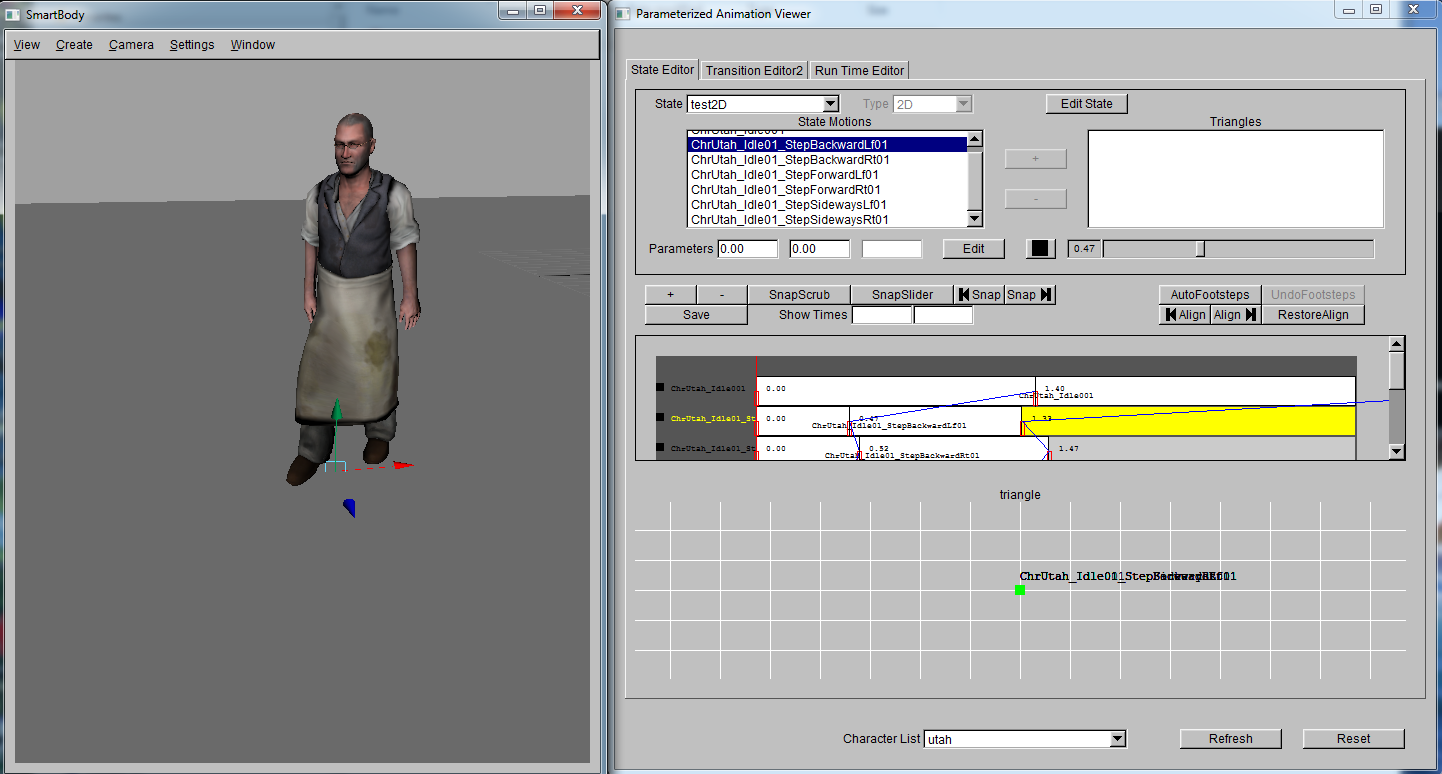
- Type List: type of current selected blend, not editable. Options include 0D, 1D, 2D, 3D.
- Create/Edit Blend Button: button that leads user to create or edit a state. Details can be found in create state section.
- Blend Motions Browser: display all the motions contained in selected blend.
- Shape Browser: display all the shapes for selected blend. This only works for 2D and 3D blend. For 2D, shape means triangles, for 3D, it means tetrahedrons.
- "+" Button: create a shape by selecting motions from motion browser to the left. This only works for 2D and 3D state. For 2D, only by selecting three motions, this button will be active. For 3D, user has to select four motions to activate this.
- "-" Button: delete selected shapes from selected state.
- Parameters Inputs: inputs that display x, y, z parameters for selected motion. User can change the value directly. x parameter will be active for 1D, 2D and 3D state. y parameter will be active for 2D and 3D state. z parameter is active for only 3D state.
- Edit Button: batch edit motion parameters. Details can be found later.
- Play Button: play the selected motion.
- Frame Slider: play the selected motion at specific frame.
Second section, correspondence points editor.
- "+" Button: adds one correspondence point to every motion inside selected blend. The points will be added according to the position of scrub line.
- "-" Button: delete one correspondence point from every motion inside selected blend.
- SnapScrub Button: move the current selected correspondence point to the scrub line. It also do a correspondence points check to make sure all the correspondence points are in ascending order.
- SnapSlider Button: move the current selected correspondence point to the value of the slider and then do a valid check.
- SnapToBegin Button: move the current selected correspondence point to 0.
- SnapToEnd Button: move the current selected correspondence point to end of the motion.
- Save Button: save the current blendto a destination python file.
- Show Times Inputs: Specify the minimal and maximal show time for correspondence points editing widget.
- AutoFootSteps Button: button allows detecting foot steps automatically. Details can be found in later section.
- UndoFootSteps Button: restore the result before doing auto foot steps detection. It only keep tracks of one action.
- AlignToBegin Button: cut the last frame of selected motion and paste it to the begin.
- AlignToEnd Button: cut the first frame of selected motion and paste it to the end.
- RestoreAlign Button: restore all the alignment action done to selected motion.
- Correspondence Points Edit Widget: display each motion as a block and each correspondence point as a mark. By selecting the motion, corresponding track will be highlighted. User can also drag the marker. A scrub line will be draw if user hit Play Button. A alignment line will be draw if user did align action.
Third section, parameter space visualizer.
- Draw parameters in 2D/3D space. 3D blendwill have a 3D visualizer and 0D, 1D, 2D blendwill have a 2D visualizer. Shapes will also be draw here. Triangles for 2D blend and tetrahedrons for 3D blend.
Create Blends
Basic steps to create a blend includes: add motions into the blend, set type, setup correspondence points, edit parameters, crafting shapes, save out.
- Add motions and set type: select empty blend, and click create blend button. You will be able to go to Edit Blend window.

- Setup correspondence points: By default, there would be two correspondence points added for each motion at beginning and end. User can press "+" button to add markers. By pressing Play Button, user can see how the motions looks on specific character. By dragging the frame slider, a scrub line will be drawn on motion track. Correspondence points will be added accordingly to the scrub line. Then user can adjust it by dragging it or press SnapScrub/SnapSlider/SnapToBegin/SnapToEnd button.

- Edit Parameters: this step is not needed for 0D blend. User can directly modify the parameters input field or use Edit button to do batch edit. First select motions need to be batch processed. Then click Edit button. This will create a Edit Parameter window. Once hit apply apply button, new parameter will be shown in parameter visualizer main window.
-Dimension: which parameter to apply. Options are X, Y, Z.
-Motion Parameter: what parameter to extract from selected motions. Options are JointSpeed, JointSpeedAxis, JointAngularSpeed, JointAngularSpeedAxis, JointTransition.
-Joint: which joint to extract data from.
-Axis: only applies to JointSpeedAxis, JointAngularSpeedAxis and JointTransition, it defines which axis to extract the data from. Options are X, Y, Z.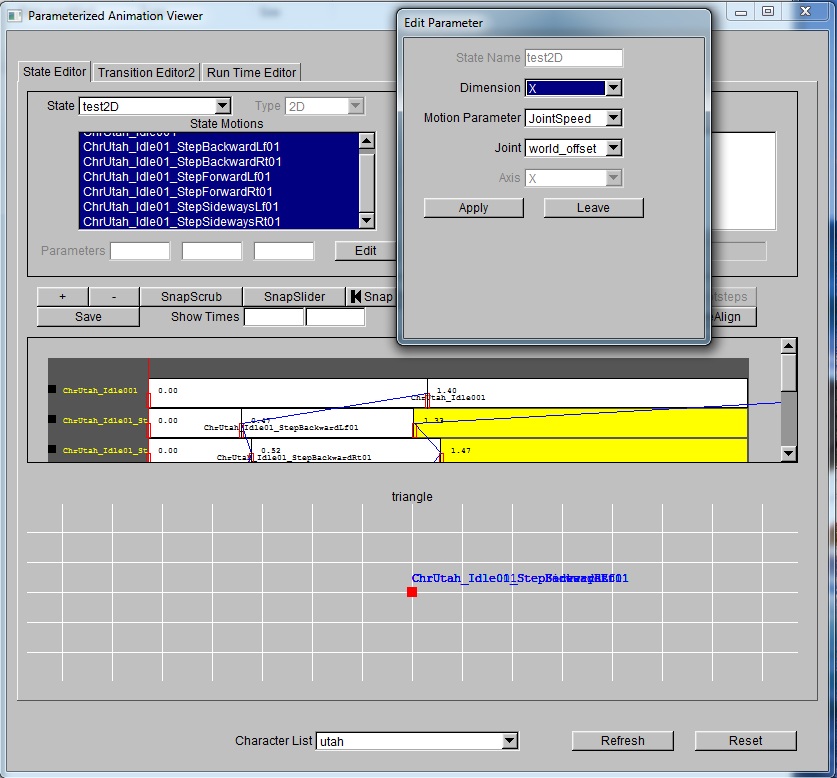
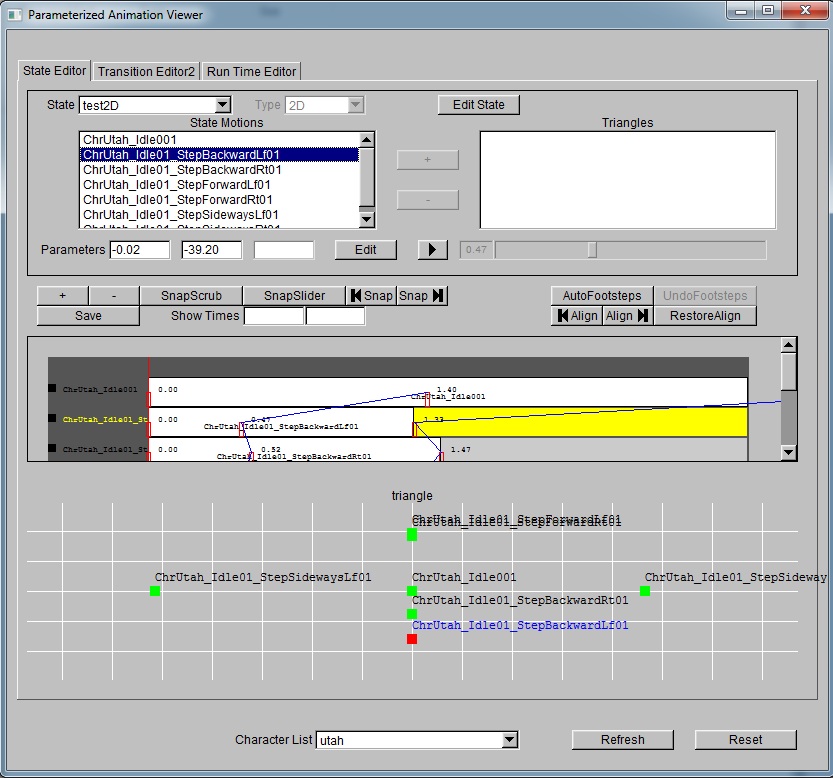
- Crafting Shapes: This step is only needed for 2D blend and 3D blend. 2D blendrequires triangles crafted and 3D blendrequires tetrahedrons. To create these shapes, select the 3/4 motions and press "+" Button.

- Save: Once all are done, save the file out by hitting save button. Here is examples of output file for each dimension. test0D.pytest1D.pytest2D.pytest3D.py
Advanced steps illustrated below will help speed up the setting up process. These steps includes motion preparation, auto footstep detection. They are particularly important when creating complicated blend, e.g. locomotion state.
- Motion preparation: it includes mirroring, duplicate cycles, aligning.
-Mirror: art asset sometimes only have half of the motions. Use following python command, user can easily mirror the right motion to the left motion.
motion = scene.getMotion("ChrUtah_RunInCircleLeft001")
mirrorMotion = motion.mirror("ChrUtah_RunInCircleRight001")
-DuplicateCycles: sometimes you may have walk animation with one cycle and jog animation with two cycles. To make all the animations consistent on cycles without going back to artist. User can use the following command:
motion = scene.getMotion("ChrUtah_Run001")
duplicateCycleMotion = motion.duplicateCycle(1, "ChrUtah_Run001_duplicate1")
-Align: for some blend, user may want all the animations start with the same posture. For example, inside locomotion state, it would be great if all the animation start with the left foot. To achieve that, user can use the align function. After aligning, an alignment black line will be drawn on the highlighted motion block.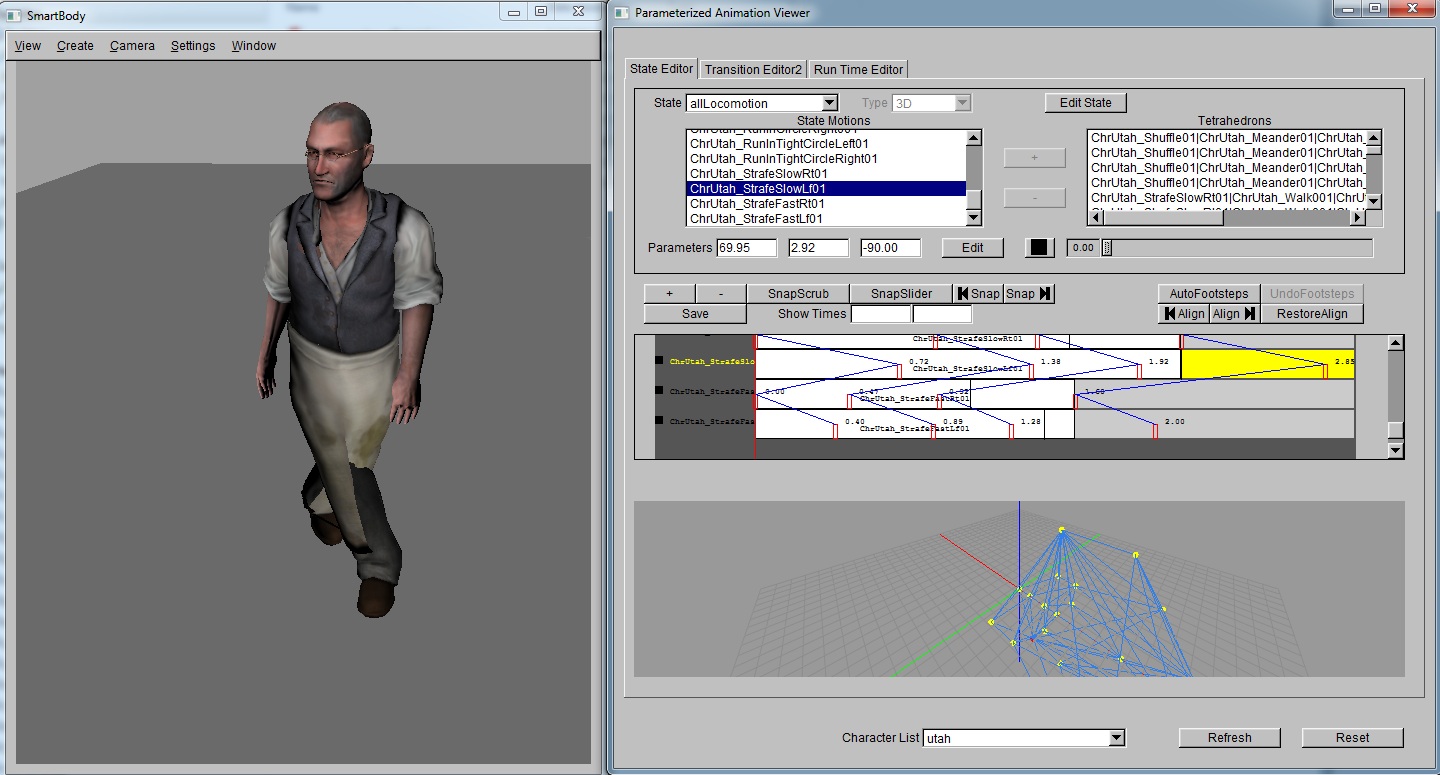
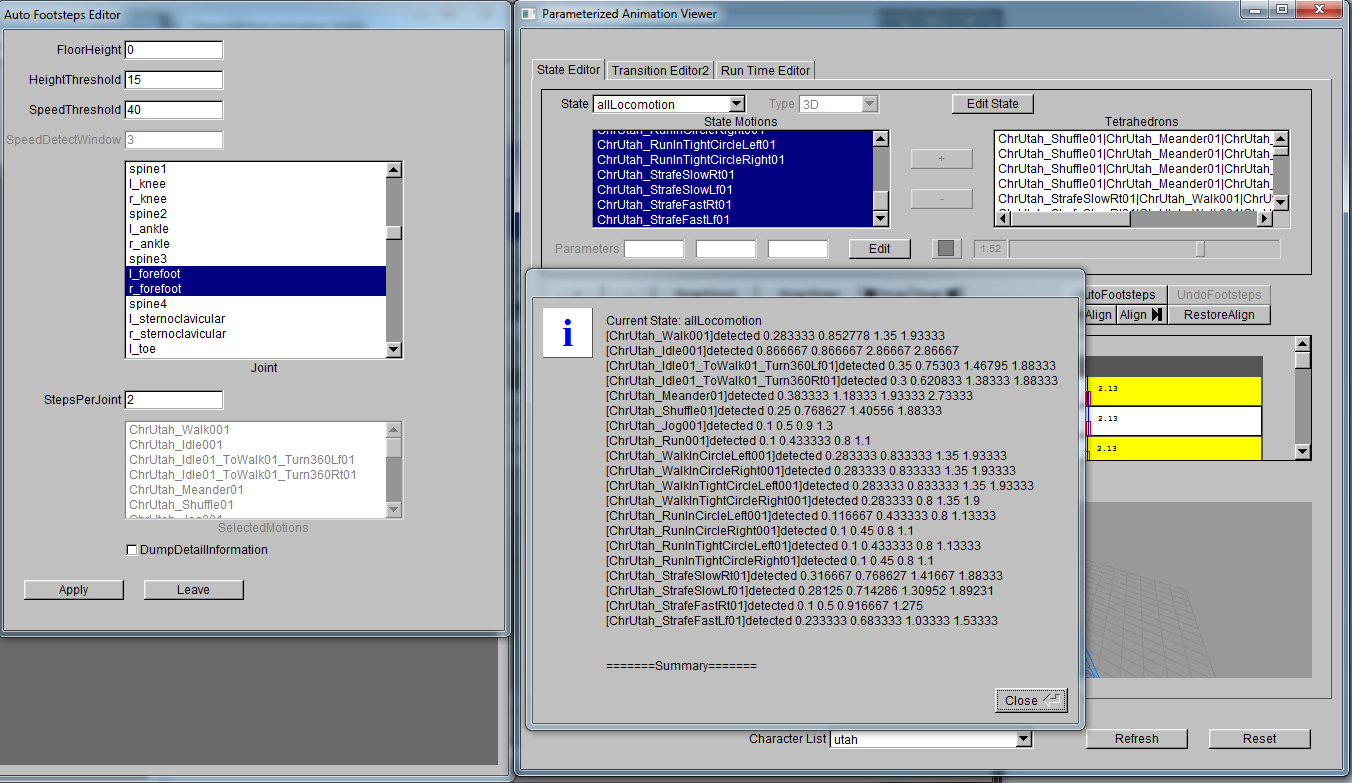
- Auto Footstep detection: For locomotion blend, it would be really helpful if there is an automatic method to detect footsteps. To do that, select motions to run the process then click AutoFootsteps button, a new window will show up.
-FloorHeight: defining floor height
-HeightThreshold: under what height would the foot be considered on the ground
-SpeedThreshold: below what speed would the foot be considered still
-SpeedDetectWindow: how large is the window for calculating joint speed. Not active.
-Joint: what joints will be processed
-StepsPerJoint: how many steps user want to get for each joints. This input field is active only when all the motions inside the state are selected. If only subset of the motions are selected, the desired steps for joint would be based on how many correspondence points are there for each motion inside the blend.
-SelectedMotions: what are the motions current selected. Not active.
-DumpDetailInformation: Print the detailed output from footsteps detection algorithm or not.
After applying the algorithm, a popup window will show up printing out the final result, new corresponding point will show up in the main window.