SmartBody characters can receive data and be controlled by a Kinect camera. This works as follows:
- A standalone application reads the data from the Kinect (kinecttracker for OpenNI, or SBKinectViewer for Microsoft Kinect SDK)
- The application sends a message over the ActiveMQ network containing joint positions and orientations
- SmartBody receives the ActiveMQ message, then overrides the joint position and orientations of the joints of one or more characters
- Any joints not overridden (such as the face and fingers) will retain the existing character positions and orientations.

Note that the skeleton from the Kinect does not match the topology or bone lengths of the SmartBody character.The retargeting is done manually by mapping the standard names of the Kinect character to similar names on the SmartBody character. Thus the "RightWrist" of the Kinect character will map to the "r_wrist" of the SmartBody character. For Kinect SDK application, we also send out the Kinect skeleton information in addition to joint rotation. So that SmartBody can make use of our on-line retargeting function to convert the Kinect data for many different characters on the fly.
Also note that any motion capture system could use a similar mechanism to control a SmartBody character by sending the appropriate SmartBody commands in order to override the joint information.
Controlling SmartBody Characters With Kinect
SmartBody characters can be configured to respond to external applications, such as kinect or other motion tracking devices. To enable this functionality, first tell SmartBody that an external application will be controlling the character via the following command:
scene.command("receiver enable")Next, each SmartBody character has an attribute called 'receiverName' which determines the id of an external controller. The kinnecttracker application uses the name 'utah' by default, so this can be set on the character by doing:
scene.setStringAttribute("receiverName", "utah")Note that more than one character can be controlled by the same kinect by assigning the same receiverName to each character.
To stop controlling the character via the kinecttracker, call:
scene.command("receiver disable")Building Microsoft Kinect SDK Application on Windows
| 1 | Download and install Microsoft Kinect SDK, and Kinect for Windows Developer Toolkit at: http://www.microsoft.com/en-us/kinectforwindows/develop/developer-downloads.aspx The SDK will install the drivers on your machine. |
| 2 | Go to trunk\lib\SBKinectViewer, select the solution file (currently only support 2010). Note that you have to first build smartbody-fltk project before building SBKinectViewer, you have to use the same visual studio version for building both projects. |
| 4 | Run smartbody fltk viewer, load up KinectDemo.py from trunk\data\examples, and run SBKinectViewer built in step 2 at the same time. |
Use Microsoft Kinect SDK Application
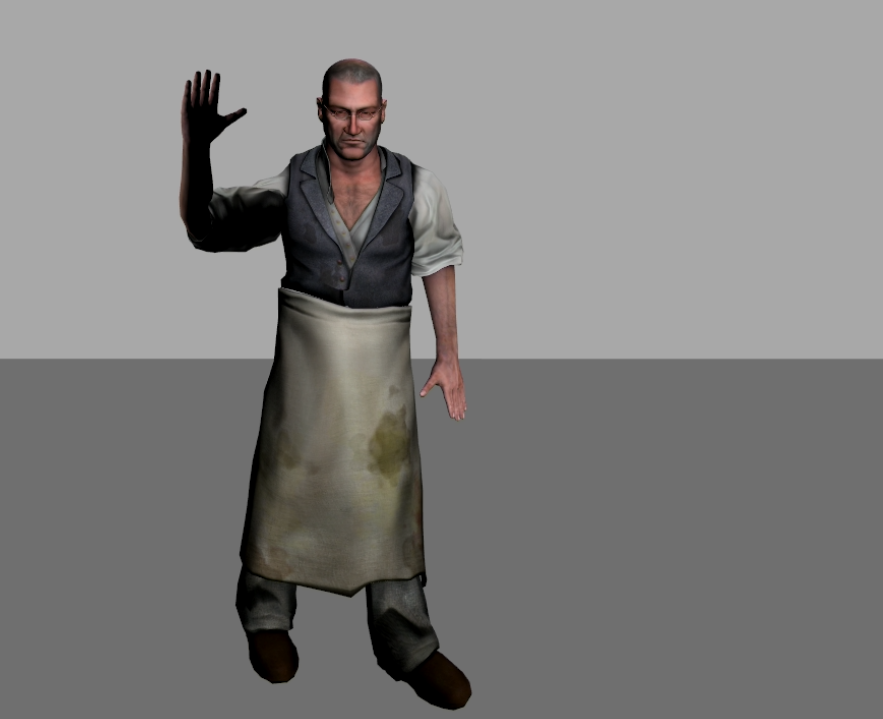
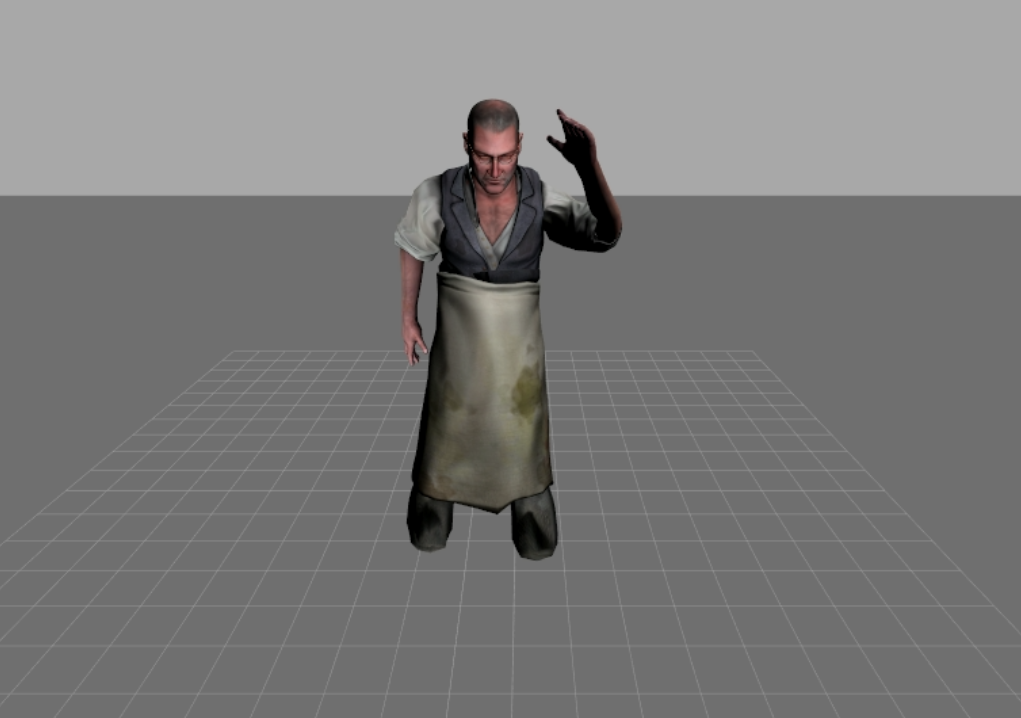
First, start smartbody-fltk viewer, and load up KinectDemo.py in the folder \data\examples. Once it's finished loading, you should see a Utah character like the image below.

Second, start SBKinectViewer located in folder \lib\SBKinectViewer. It should looks like the image below :
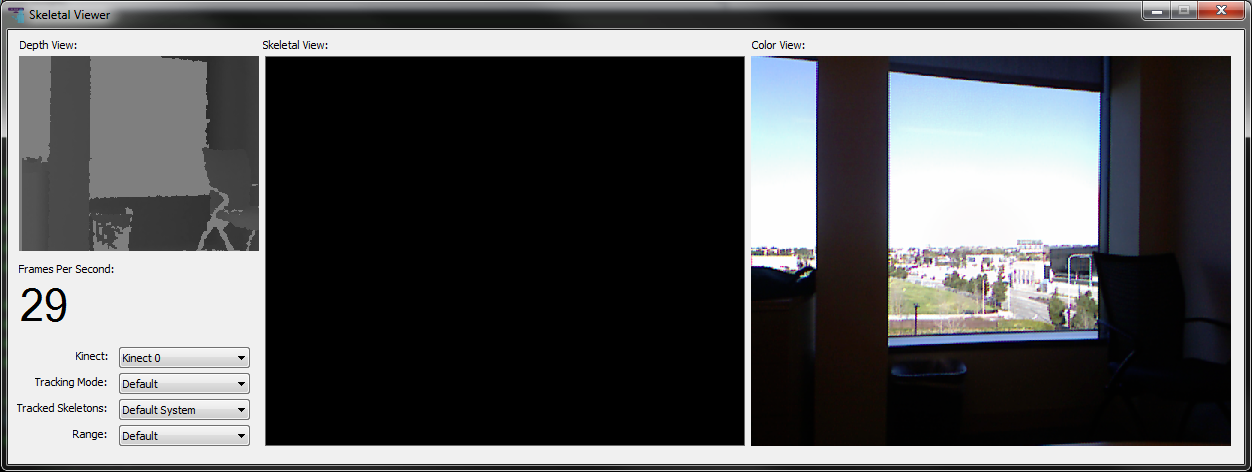
Then the user needs to step into the view of Kinect Camera until a full skeleton is seen in the Skeletal View. Note that the Color/Depth/Skeletal Views below will show the mirror version of the capture.

Once the skeleton is tracked by Kinect, the joint angle data will be sent to SmartBody and converted for Utah character. You will see Utah is mimicking the pose of the user.
Building OpenNI Kinect Application on Windows
Note: Kinect SDK driver might have a conflict with OpenNI driver, so be sure to uninstall Kinect SDK driver before using SmartBody Kinect Application.
| 1 | Download and install OpenNI 32-bit Development Edition http://www.openni.org/wp-content/uploads/2012/12/OpenNI-Win32-1.5.4.0-Dev1.zip Select 'OpenNI Binaries' , 'Stable', then choose the Windows x86 32-bit Development Edition |
| 2 | Download the Kinect drivers http://www.openni.org/wp-content/uploads/2012/12/Sensor-Win32-5.1.2.1-Redist.zip |
| 3 | Download and install NITE http://www.openni.org/wp-content/uploads/2012/12/NITE-Win32-1.5.2.21-Dev.zip Select 'OpenNI Compliant Middleware Binaries' , 'Stable', then choose the PrimeSense NITE Windows x86 Development Edition
|
| 4 | Go to trunk\lib\kinecttracker, select the solution file according to your visual studio version and build(currently supporting 2010 and 2008). Note that you have to first build smartbody-fltk project before building kinecttracker, you have to use the same visual studio version for building both projects. Please make sure win32 platform is chosen when building the solution. Also make sure OpenNI is installed at C:\Program Files (x86)\OpenNI, if not, you need to manually change the project including path to the your customized OpenNI location. |
| 5 | Run smartbody fltk viewer, load up KinectDemo.py from trunk\data\examples, and run kinecttracker.exe built in step 4 at the same time. |
Building Kinect Application on Linux
The original instructions for installing OpenNI and NITE are found here: http://www.greenfoot.org/doc/kinect/ubuntu.html, but is detailed below:
| Instructions | |
|---|---|
| 1 | Retrieve and install the OpenNI drivers cd OpenNI wget http://www.greenfoot.org/doc/kinect/OpenNI-Linux32.tar.bz2 tar -jxf OpenNI-Linux32.tar.bz2 sudo ./install.sh cd .. |
| 2 | Retrieve and install NITE mkdir NITE cd NITE wget http://www.greenfoot.org/doc/kinect/NITE-Linux32.tar.bz2 tar -jxf NITE-Linux32.tar.bz2 echo '0KOIk2JeIBYClPWVnMoRKn5cdY4=' | sudo ./install.sh cd .. |
| 3 | Install the Kinect driver for Linux mkdir Kinect cd Kinect wget http://www.greenfoot.org/doc/kinect/SensorKinect-Linux32.tar.bz2 tar -jxf SensorKinect-Linux32.tar.bz2 sudo ./install.sh cd .. |
| 4 | Make sure that your ActiveMQ service is running, since messages between the standalone kinect application and SmartBody are managed via ActiveMQ. If it is not running, run: sudo activemq start |
| 5 | Build the kinecttracker application located in smartbody/lib: uncomment the line in smartbody/lib/CMakeLists.txt that says: add_directory ( kinecttracker)by removing the hash mark (#) in front of that line. This will add the kinecttracker application to the standard SmartBody build process. Then build SmartBody: cd smartbody/build
|
| 6 | Run sbgui: ./smartbody/core/smartbody/sbm/bin/sbgui |
| 7 | The character that is controlled by kinect depends on the attribute 'receiverName', which is set to 'kinect1' by default, which is the first character the kinect tracks. If you want the SmartBody character to respond to the second or greater skeleton tracked by kinect, set the 'receiverName' to 'kinect2' or 'kinect3': From Python: c = scene.getCharacter("utah") |
| 7 | Run the kinecttracker application:
./smartbody/lib/kinecttracker/kinecttracker
Then approach the kinect camera and track your pose. You should be able to control one or more characters with the kinect data. |
Building OpenNI Kinect Application on OSX
We use the OpenNI library (http://www.openni.org)